RSS

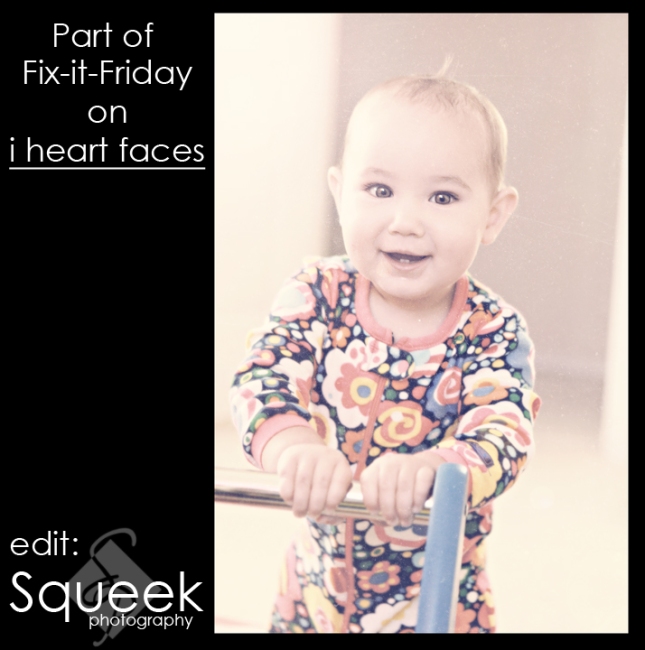
FiF #86 – edit by SqueekPhoto.com

It’s the end of the week… and that means it’s time for another

I heart Faces logo


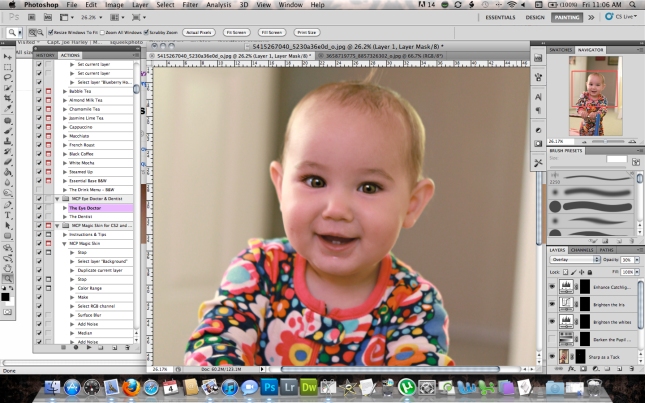
I’ve got a few screen caps this week to hopefully help you see better what I did to this photo. Not as much needed really for this photo – especially compared to last week!

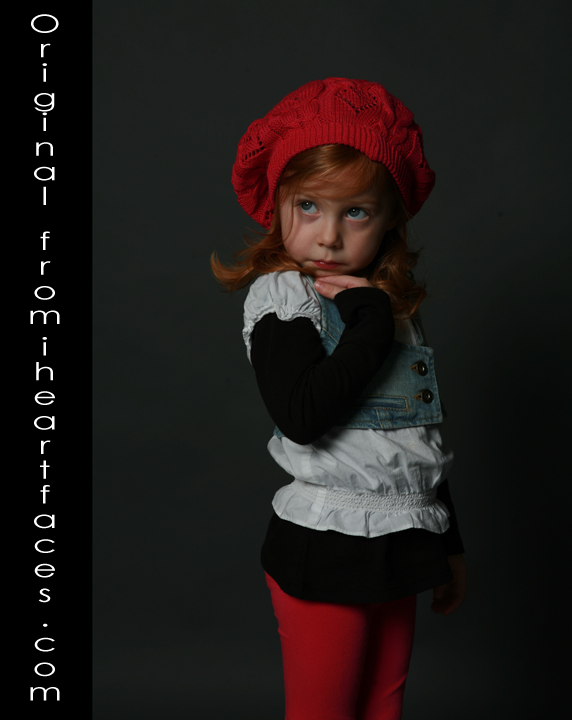
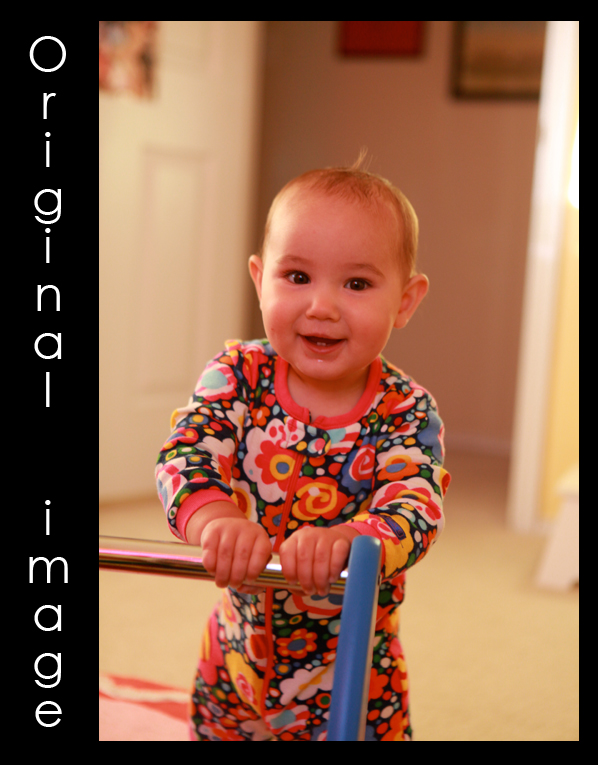
So you start out with the original photo – Again, starting by opening up in Photoshop (cs5).

Click image for LARGER version

Now comes the fun part, the editing:
1. Ran MCP Action from the ‘Quickie Collection’ – Exposure Fixer, layer opacity at 30% AND Fill Flash, layer opacity at 35%.
2. Flatten and Snapshot in the History Pallet. (I do this so I can toggle back and forth quickly after each step – especially if I didn’t like a particular effect). Here’s where that’s located for those that are wondering – “History, what!?” =) On the bottom of that menu there’s a little camera. Clicking that takes a snapshot.

3. Ran Florabella Action from the ‘Spring Set 1’ – Blossom. Opened it up and set opacity to 28% on Darken layer and 50% on Blossom layer.

4. Flatten and Snapshot from History Pallet.
5. Duplicate background layer, Command + J. Use the patch tool on this layer to remove the dust spots. I circled those in red in the screen capture so you could easily see what I was talking about. *note to the original photographer – you need to clean your sensor! lol!*

Here’s the after on the patching of the area under the eyes:

6. Flatten and Snapshot.
7. Command + J again, and this time patch the area under the eyes you saw circled on that red circle screen cap. Then layer opacity at 80%.
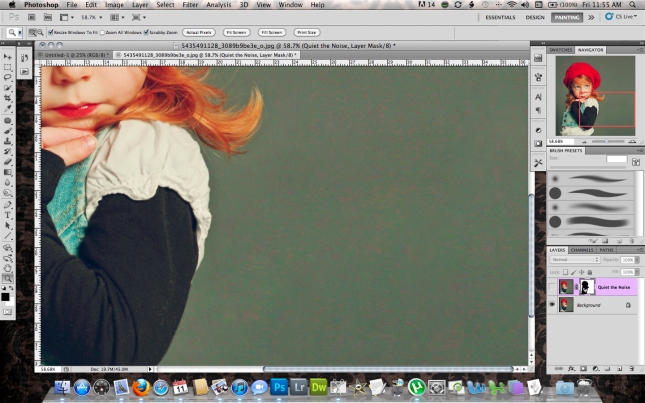
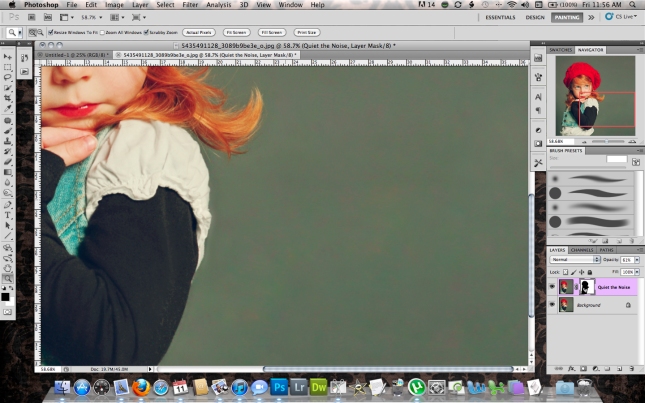
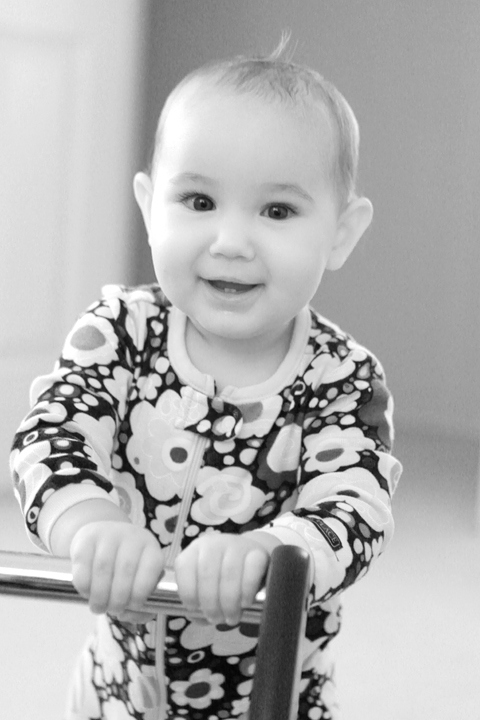
8. Ran MCP Action from the ‘All in the Details Set’ – Quiet the Noise. Masked in background w/100% opacity large brush for main part of background. Then went back closer to subject to refine the edge with 30% opacity smaller brush. Made sure to reverse that and unmask the subject fully. I didn’t want the effect on her. EXCEPT on her black sleeve. It was kinda noisy too… so I hit it a tiny bit with the 30% opacity brush. Below are two screen caps – to better see what effect this action had on the photo. Top is without the action, Bottom is with the action.

9. Flatten/Snapshot.
10. Ran MCP Action from the ‘All in the Details Set’ – Hi-Definition Sharpening. Layer at 60% opacity.
11. Ran MCP Action – Eye Doctor, to taste on eyes.
12. Flatten/Snapshot.
13. Ran MCP Action from the ‘Magic Skin Set’ – Powder your nose. To taste on face and hand. Overall layer opacity @ 59%.
14. Cropped and found that I would like it a little more squared off… so I added a little to the background. How I did this? Crop for the size/shape you want. Select area that’s new with the rectangular selection tool and hit delete. Make sure Content Aware is selected. It sucked for this particular photo. LOL. SO! Since my normal method didn’t work, I used the rectangular selection tool to grab a part of the background and then transformed (command + t) to fit the new crop. It looked a little wonky, so I grabbed the patch tool and cleaned it up to make it look right. It’s not perfect… but it’s better than what happened with content aware! lol!

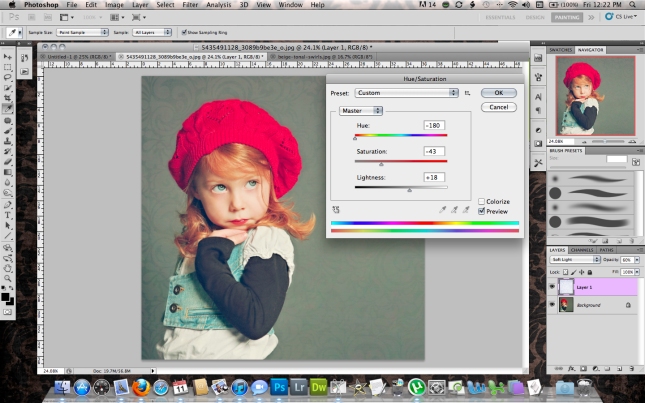
15. The VERY last thing I did was to throw a texture from Sassy on there… I went back over her skin with a 20% opacity brush to mask out that texture over her skin… but not too much. I liked the effect the color of the texture had on the photo. I did also tweak the color of the overlaid texture to better compliment the photo. Here’s a screen cap of what that looked like:

DONE! =) As usual, I’d really love to hear your thoughts on this blog post and the results of my editing! Please leave me a comment below! THANKS SO MUCH!

~Squeek!

 
4 Comments

Posted by on February 11, 2011 in general, how to, Photography, tutorial


Tags: , , , , , , , , , , , , , , , , , , , , ,

Photo Challenge – Hearts (my entry)

click on the badge above to check out the iheartfaces website!


I was at a loss for what I wanted to enter for this week’s challenge on iheartfaces. After foolin’ around with the kids for a bit I decided to call it quits. I figured I had enough photos to sift through, so I got to it.


This little gem loaded. Didn’t take much to edit this one really. I added some of my photo-flare/vector art… and the photo itself was a Florabella Action, Blossom and a little MCP sharp-as-a-tack action. Pretty easy edit because it was pretty close to perfect in camera. =) For the record… this thing with her hands is a new trick for her. She came home from school a couple weeks back and showed me that she could do this shape with her hands. I just love watching her grow up and learn new things. It’s pretty awesome! =D


Without further ado – here’s my entry for this week. Feel free to leave a comment below to let me know what you think of my entry this week! I love to hear what you think! THANKS FOR STOPPING BY! =D (click the photo below to see it larger)

~Squeek!


click to see larger

All you need

 
9 Comments

Posted by on February 7, 2011 in children, Photography, portfolio, website


Tags: , , , , , , , , , , , ,

Fix-it-Friday #85

It’s the end of the week… and that means it’s time for another

I heart Faces logo

Today’s original image was a real fixer-upper!

Original Photo - resized for web

The easiest way to fix this image – assuming you really really want to save it – is to do a black and white conversion. For people, I tend to prefer the red-filter black and white conversion. Here is the result of that particular method.

red filter black and white

Red Filter Black and White

I think that turning this image black and white is like taking the easy way out though. If you’ve got the time, you can always try to salvage the image in color. That’s what I did today. Here’s the breakdown on exactly what I did to this image in an attempt to save it in color.

1. Open File in photoshop CS5.
2. go to IMAGE/ADJUSTMENTS/COLOR BALANCE: highlights @ +3,+3,+3 midtones @ -23,+8,0 shadows @ -4,-7,-8
*For the step above I was concentrating on the backgrounds colors – not the subject yet.
3. Command + J – duplicates layer.
4. IMAGE/ADJUSTMENTS/HUE&SATURATION: Hue@+4, Saturation @-14, Lightness@+8 and click ‘ok’.
5. Flatten Layers and then take a snapshot in the ‘History’ pallet.
6. Florabella Luxe Action Set – Sharpen/Defog.
7. Flatten Layers and then take a snapshot in the ‘History’ pallet.
8. Totally Rad Action Set – Cool as a Cucumber.
9. Flatten Layers and then take a snapshot in the ‘History’ pallet.
10. Wonderland Action Set – Reduce Skin Reds.
11. Apply a layer mask to that layer, & Command + i – inverts the mask (making it black)
12. Paint with a soft white brush on the mask the skin of subject. I used a smallish brush at 100% opacity. (I like to make sure the skin is covered evenly with this mask. That’s why it’s at full opacity. THEN~
13. Adjust overall layer opacity to 50%.
14. Flatten Layers and then take a snapshot in the ‘History’ pallet.
15. MCP Action Set – Eye Doctor – to taste on all layers in action.

– SO HERE’S WHERE WE SIT SO FAR –

16. Flatten Layers and then take a snapshot in the ‘History’ pallet.
17. Paint the Moon Free Action – Sugar Cookies.
18. Flatten Layers and then take a snapshot in the ‘History’ pallet.
19. Totally Rad Action – Derelicte @ 46% opacity.
20. FILTER/Totally Rad Actions Dirty Pictures (this is a plug-in) – used Roxy Giltterhips texture at 78%. Brushed over the face with 30% opacity brush on the auto generated mask layer of texture.
21. Flatten Layers and then take a snapshot in the ‘History’ pallet.
22. Totally Rad Action – Bitchin’ Black and White – Group opacity @ 23%.
23. Flatten Layers and then take a snapshot in the ‘History’ pallet.
24. Crop.
25. Totally Rad Action – Beer Goggles: Using the radial gradient tool on the mask layer, masked in the head. Whole group opacity @55%.
26. Flatten Layers and then take a snapshot in the ‘History’ pallet.
27. Totally Rad Action – Slice it like a Ninja @ 100%.
28. Flatten Layers and then take a snapshot in the ‘History’ pallet.
29. Florabella Action – Sun and Lensflare (left): Turned the ‘sun’ layer off, and ‘gradient tone’ layer down to 7% opacity.
30. Flatten Layers and then take a snapshot in the ‘History’ pallet.
31. Wonderland Action Set – Retro – 70’s Beat: Group @ 65% opacity.

-DONE- YAY!!! =D
Here’s the finished product:

fix it friday edit by squeekphoto.com

I know this was another long one… but there was really no short way in my mind to do this and keep it in color. Feel free to leave me a comment telling me what you think of this image edit/breakdown. I’d love to see what you do with it too! (drop me a link in the comments if you like).

Have a great weekend!!! =D

~Squeek!

 
2 Comments

Posted by on February 4, 2011 in Photography


80° and Sunny!

Not that I’m gloating or anything – for all you who are being hammered by snow storm after snow storm right now. I really feel for you all! I *wish* it would cool back down or even snow here! (Central Florida).


So, this week – yesterday actually – we headed up to one of the many local parks in our area to let the kids run off some energy and enjoy the sunny day. We spent a few hours playing – me taking photos with a friend… trying to help her out with her camera questions along the way. She’s got a knack for it…. she’s just gotta get out there and shoot! =) Here’s an image that she took yesterday (edited by me):


the sit and scare

I really love how this image came out. It wasn’t her favorite, but it certainly was mine! The thing Parvati (my youngest daughter) is on is some crazy spinning thing. I suppose you sit in it and then spin around – or have someone else spin you around! Both kids would climb in and start to spin around and freak out. I’d help them out and they’d run off – only to return to this crazy contraption a few minutes later to do it all over again. I guess that means it’s not too scary, huh? lol.


I snapped a few shots too while chasing the kids around. Enjoy! =D

That’s it for today! Most of these were edited with some lightroom presets and then thrown over to photoshop cs5 for watermarking…. a few had a little extra done… all were shot in natural light. Enjoy the photos and I’ll post another photo-edit-breakdown soon! ❤ =)


~Squeek!
 
2 Comments

Posted by on February 2, 2011 in children, Photography, portfolio, portraits


Tags: , , , , , , , , ,

People’s Choice Photo Challenge – Best Face Photo (January)

I popped over to iheartfaces today…. and saw they were running a weekly photo challenge today.

I thought, “Yay! More fun!” =) So here’s my entry in their contest. I *think* this is the best entry I could put out there…. though I’d love to hear what you think of it compared to some of my other work which you can see on my website.

Squeek Photography

click on the badge above to check out the iheartfaces website!

Here’s my entry for this week’s contest: Best Face Photo in January.

Strobist Setup:

1AB800 at 1/16 power behind subject with 20° grid. Had to hide the bee below the shoulders of the subject and point it upward slightly. about 3-4 feet from charcoal-colored seamelss. (slaved)

1SB800 with DIY ring light around camera at 1/8 power in front of subject – even in height to subject’s upper head. about 2-3 feet away from subject. (triggered with PWplusII)

I’d love to hear your thoughts on this photo! Please leave them in the comments section below! Thanks for your time!

AND HAPPY MONDAY! =D

~Squeek!

 
17 Comments

Posted by on January 31, 2011 in Photography, portraits, seamless, website


Tags: , , , , , , , , , , , , ,